Texturing a wall with a hopper gun is a straightforward process that can give your space a unique and stylish finish. To texture a wall using this tool, you’ll need to prepare your surface, mix your texture material, load the hopper gun, and spray it onto the wall. Let’s dive into the nitty-gritty of how to do this effectively!
Getting Started: What You Need
Before you jump in, gather your supplies. Here’s what you’ll need:
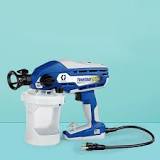
- Hopper Gun: This is your main tool for applying texture.
- Texture Material: Choose between premixed or dry mix options.
- Air Compressor: Most hopper guns require air pressure to spray.
- Drop Cloths: Protect your floors and furniture.
- Masking Tape: For clean edges around windows and doors.
- Safety Gear: Dust mask and goggles to protect yourself.
Preparing the Surface
- Clean the Wall: Make sure it’s free of dust, dirt, and grease. A clean surface helps the texture adhere better.
- Repair Imperfections: Fill any holes or cracks with spackle or joint compound. Sand it smooth once it’s dry.
- Prime the Wall: If you’re working with bare drywall, applying a primer can help the texture stick.
Mixing Your Texture Material
Depending on what texture look you’re going for (knockdown, slap brush, etc.), the mixing process may vary:
Dry Mix
- Follow the instructions on the bag to get the right consistency. Usually, you want a thick pancake batter-like texture.
Premixed Texture
- If you’re using premixed material, just give it a good stir to ensure uniformity.
Loading the Hopper Gun
- Fill the Hopper: Pour in your mixed texture material.
- Adjust Settings: Set your air pressure on the compressor; start low and increase as needed for better control.
Spraying the Texture
Technique Matters
- Hold the Gun at an Angle: Aim for about 45 degrees from the wall for even coverage.
- Move Steadily: Keep your hand moving to avoid heavy spots. Overlap each pass slightly for consistency.
Creating Patterns
- Experiment with different techniques! For example:
- Knockdown Texture: After spraying, use a knockdown knife to flatten raised areas.
- Slap Brush Texture: Use a brush after spraying to create unique patterns.
Finishing Touches
Once you’ve textured the entire wall:
- Let It Dry: Follow the manufacturer’s drying time before painting.
- Paint If Desired: A fresh coat of paint can really enhance the look of your new texture.
Summary
Texturing a wall with a hopper gun can be an exciting DIY project that adds character to your home. With some prep work and practice, you’ll be able to achieve professional-looking results right from your living room!
FAQ
How long does it take for textured walls to dry?
Drying time can vary based on humidity and temperature but generally takes about 24 hours for most textures.
Can I use a hopper gun on ceilings?
Absolutely! Just be mindful of overspray and consider using scaffolding or a sturdy ladder for reach.
What if I make a mistake while texturing?
No worries! You can always scrape off excess texture while it’s still wet or sand it down once dry before reapplying.
Is texturing walls difficult?
Not at all! With some practice and patience, most DIYers find it quite manageable. Just take your time and don’t rush!
Do I need special paint for textured walls?
While not necessary, using a thicker paint or one designed for textured surfaces can help achieve better coverage and durability.

